I immediately searched for a design that would give these tools justice. I looked for pegs and stumbled upon Chalkboard Nails' nail art dotting contest. There were so many pretty entries, I had a hard time choosing! I don't know who actually won the contest, but my personal pick is monkeybuttsmomma's Dippin' Dots nail art!
The inspiration is the revolutionary ice cream brand Dippin' Dots--"the unique, futuristic and fun way to eat ice cream!" I fell in love with this design right away! Banana Split is also my favorite flavor! Sadly, I don't have any yellows in my stash and couldn't replicate this color combo. And what's a banana split without the banana???
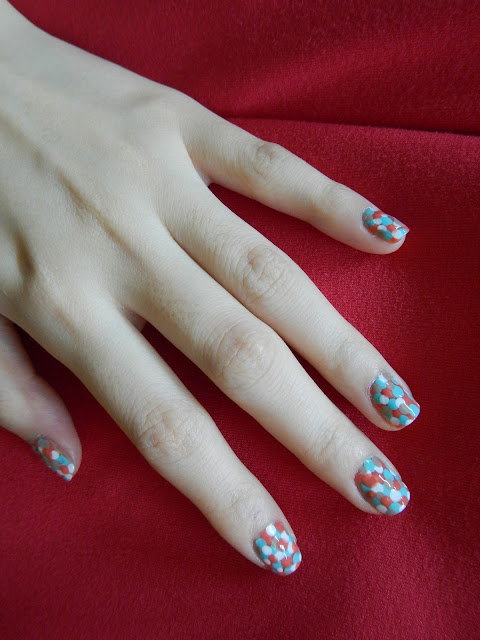
So here's my take on it.
 |
| This looks like a yummy jelly! |
 |
| Close up shot |
I settled with 4 colors that looked good together. I don't think they resemble any of the Dippin' Dots flavors though. From left to right, I used OPI My Boyfriend Scales Walls, Orly Country Club Khaki, China Glaze For Audrey, and L'Oreal Steel Colour Hard Core Creme.
Here are earlier variations that i tried.
I can't wait to try this again with a new combo. It's so easy, you can do it yourself!! Trust me!
Here are the simple steps:
1. Put on a base coat. I used Orly Bonder.
2. Choose 2 or more colors of polish. If you don't have a dotting tool, just get a hair/bobby pin and dot away! Make random dots all over the nail, interchanging the different colors of polish. They don't have to be evenly spaced. The more sporadic, the better!
3. Finish with a top coat. I used Seche Vite dry fast top coat.
Easy peasy? Easy peasy!
Be prepared to be a head turner! :) This design catches a looot of attention. I wore this to the office with my red blazer and people greeted my nails right away! Haha! Such nice compliments too! My husband thinks that my nails look like they have sticker on them though. I can't tell if that's a good thing or a bad thing. :)
Now, I said that it's easy to do, but I didn't say it was fast! (You've been warned.) The challenge about not having a base color is that you have to fill the whole nail with just dots. And I found it nicer to layer different colors randomly versus doing all the dots 1 color at a time (which is kind of how I did it). But it's really fun to do! Don't be discouraged if you don't like how it looks after a few dots or a few nails! You have to see it in its entirety.
Don't they just look fun and playful? :)
Before I removed my polish, I played around with some finishes to see if they would improve the overall design. The Orly Matte Top coat stood out and I realized that the matte finish really looks good with this manicure!! It almost looks like the real Dippin' Dots ice cream in its frozen state. Nom nom nom. :)
Now, if only I could take a shot with a cup of Dippin' Dots!! Crave. I think I'll go have some this weekend. :)
I'm taking a break from all the dots after this manicure. I'm excited to show you what's next!!
See you then!


I really like this design, will try it soon!
ReplyDeleteYou should!! It's really fun to do! You should check out my inspiration for this (monkeybuttsmama, see link above). She used a really good set of colors and hers came out exactly like Banana Split Dippin' Dots!! Yum.. <3
Delete